A Step-by-Step Timeline for Building a Commercial Site
Commercial construction projects fail when teams treat site development as a single phase. You approve a budget, sign contracts, and expect the work to follow a linear path. Then reality hits.
Equipment sits idle while permits clear. Utility conflicts force redesigns. Foundation work pauses because subgrades were never properly tested. These delays cost money and erode trust. They happen when early decisions skip critical steps or when sequencing ignores how each phase builds on the last.
If you're preparing for a commercial site-build project, understanding the actual progression of work protects your schedule and your investment.
This blog walks through the full timeline of commercial site development from preconstruction planning to final closeout. You'll see where dependencies exist, when coordination matters most, and how experienced contractors manage each stage without losing momentum.

Start with Preconstruction Planning and Site Review
Successful projects begin before equipment arrives. Preconstruction aligns drawings, schedules, permits, and logistics, so field work starts with clarity rather than questions.
Review Civil Plans, Surveys, and Geotechnical Reports
Early review of these documents prevents redesigns and delays:
- Civil plans: Show where water flows, where structures sit, and how elevations transition across the site
- Surveys: Confirm property boundaries and existing features
- Geotechnical reports: Reveal soil bearing capacity and compaction requirements
When site conditions don't match assumptions, crews can adjust plans before mobilization instead of scrambling mid-project.
Confirm Permits, Access, and Municipal Requirements
Some municipalities require erosion control installation before earthwork begins. Others mandate phased inspections that affect sequencing. Missing these requirements causes work stoppages that push deadlines and frustrate all parties.
Charles H. Hamilton coordinates with local agencies during preconstruction to confirm what's required, when it's needed, and who handles each approval.
Open the Site with Clearing and Rough Earthwork
Clearing and rough earthwork establish access, strip topsoil, and shape the site to prepare for utilities and structures.
Establish Construction Entrances and Haul Paths
Stabilized entrances prevent mud tracking onto public streets. Well-defined haul paths reduce wear on areas that will later support pavements or structures. Without these controls, equipment damages work already completed and creates compliance issues with local jurisdictions.
Perform Rough Cuts and Fills
Mass earthwork sets general elevations across the site. Crews remove high spots and fill low areas to create a platform that supports utilities, foundations, and drainage systems. Rough grading leaves room for fine adjustments once utility depths and building pad elevations are confirmed.
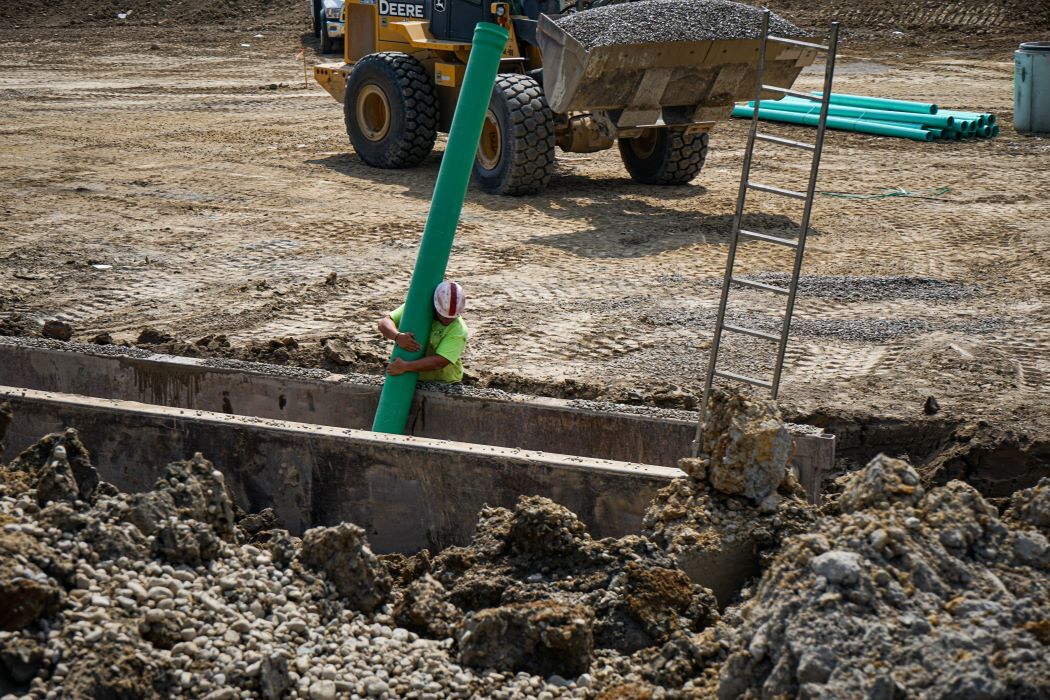
Install Underground Utilities in the Right Order
Utilities form the backbone of the site and must follow a deliberate sequence to avoid conflicts. Installing systems out of order forces rework and delays inspections.
Place Storm Systems First
Storm lines and structures establish drainage paths that influence all other utilities. These systems typically sit deepest and require the largest trenches. Installing them first gives other trades clear reference points and prevents conflicts with shallower lines.
Add Sanitary, Water, and Dry Utilities
Once storm systems are in place, crews coordinate depths, separations, and tie-ins for:
- Sanitary sewer
- Water lines
- Gas
- Electric
- Communications
Code requirements dictate minimum clearances between systems. Inspectors verify these separations before backfilling begins.
Establish Final Grades and Prepare Building Pads
After utilities are installed and tested, crews transition from bulk earthwork to precision grading. Final grades support foundations and pavements while maintaining drainage performance across the entire site.
Fine-Tune Grades around Structures and Utilities
Crews verify slopes, confirm transitions between paved and unpaved areas, and ensure water flows away from buildings and toward designed collection points. A few inches of error can redirect water toward foundations or create ponding in parking areas.
Compact Subgrades for Long-Term Stability
Crews compact subgrades to specified density levels and document results for inspection. This step supports both structural foundations and pavement systems. Skipping compaction testing creates risk. Settlement after construction leads to cracked pavements, damaged utilities, and expensive repairs.
Place Curbs, Sidewalks, and Concrete Features
Concrete work locks in site geometry and define traffic flow, access, and drainage. Once curbs and walks are in place, final paving elevations are set and changes become difficult.
Install Curbs, Walks, and ADA Routes
Curbs guide stormwater toward inlets and define parking areas. Sidewalks and ADA ramps must meet strict grade and cross-slope requirements to ensure safe access for all users. Inspectors verify these installations before paving begins.
Coordinate Concrete Work with Building Construction
Concrete placement often overlaps with vertical construction, so coordination between trades prevents conflicts. Charles H. Hamilton schedules concrete work to support building timelines without blocking access or creating hazards.
Complete Paving and Surface Improvements
Asphalt placement marks a major milestone and prepares the site for regular use. Paving protects completed utilities, provides stable access for remaining trades, and signals that the project is nearing completion.
Place Base and Surface Courses
Base courses distribute loads and prevent subgrade failure. Surface courses provide a smooth, durable driving surface that withstands traffic and weather. Crews verify compaction at each layer and adjust thickness based on design requirements.
Stripe, Sign, and Finish Traffic Areas
Striping defines parking stalls, drive aisles, fire lanes, and ADA spaces. Signage directs traffic and ensures compliance with local codes. These details complete the functional layout and allow municipal inspectors to verify that the site meets all requirements before issuing certificates of occupancy.
Stabilize the Site with Final Details and Closeout
Final stabilization protects slopes, drainage paths, and adjacent properties while completing the handoff to the owner.
Install Landscaping and Erosion Controls
Final planting and slope protection prevent soil loss and maintain water quality:
- Grass installation
- Mulch application
- Erosion blankets for slope stabilization
These installations meet environmental permit requirements and prepare the property for tenants or buyers.

Complete Inspections and As-Built Documentation
As-built drawings show the actual locations of utilities, structures, and drainage features. Inspection records confirm that all work meets code requirements. These documents support future maintenance, expansion, and property transfers.
Build with Confidence Alongside Charles H. Hamilton
Commercial site-build success depends on sequencing, coordination, and experienced field leadership. Each phase builds on the last. Skipping steps or ignoring dependencies creates delays that ripple through the entire schedule.
At Charles H. Hamilton, we guide clients through every phase with clarity, accountability, and proven processes. Our teams understand how preconstruction planning protects field work. We coordinate utilities, manage inspections, and deliver sites ready for vertical construction without surprises.
If you're preparing for a commercial development project, connect with us early. Visit our Contact page to start planning your next project with a partner who knows how to execute from day one.